I take tons of photos every day.
Even if I see something that is not so interesting, I take a snap.
I try not to do it, but this has become an obsession.
As a result, I am running out of storage most of the time.
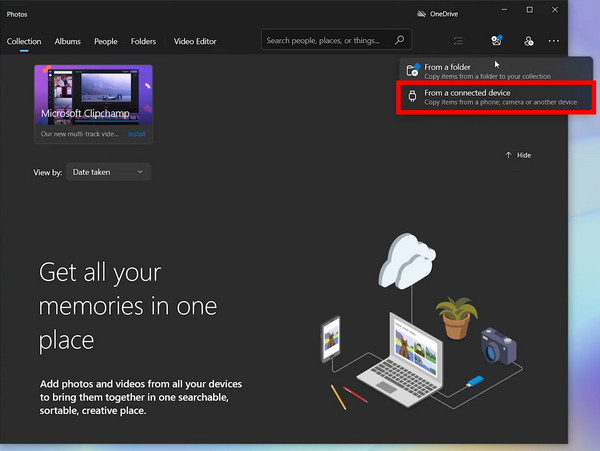
I can offload all photos from my iPhone to my Windows computer and regain the storage space.
Its called Photos, for obvious reasons.
You may have copied files from a USB drive or a Camera a million times.
This is no different from that.
But first, the PC needs to recognize the iPhone.
You need iTunes for that.
That way, all necessary drivers will be installed on your PC.
Lets prep your phone for the transfer, then.
Connect your iPhone to the PC
Download the latest version of iTunes fromApples Website.
If you already have it installed, do check for updates and install its latest iteration.
Now connect the iPhone to the PC using a lightning to USB cable.
Unlock your phone using your passcode.
You should see two alerts now.
To transfer the files, we need to allow both, so tap onTrustandAllow, respectively.
The iPhone should now be detected as a drive on your PC.
That means Windows has detected it properly.
So, lets transfer the photos now.
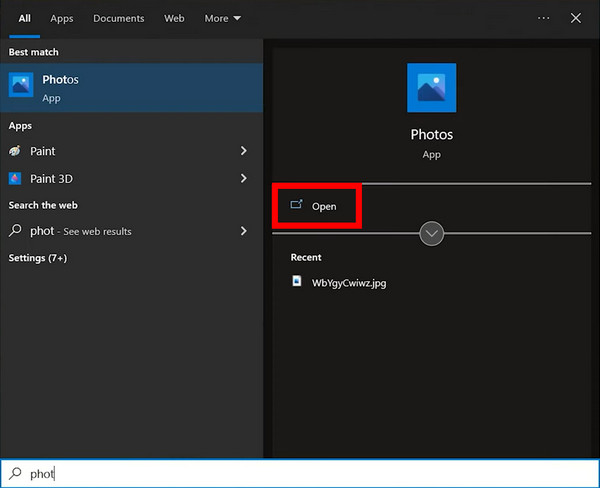
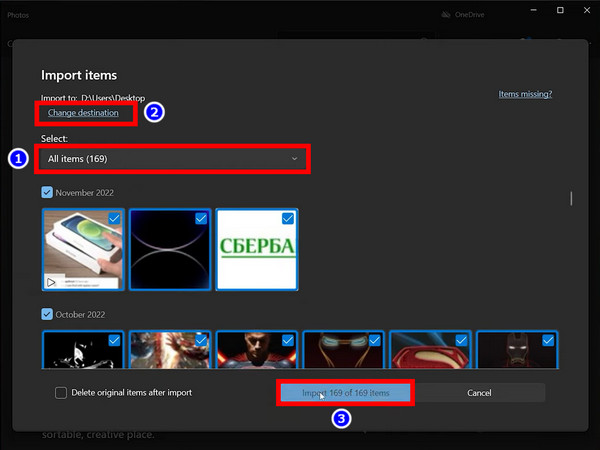
Transfer Using the Photos App
This app comes preinstalled with Windows.
That means you do not need to download it from some app store.
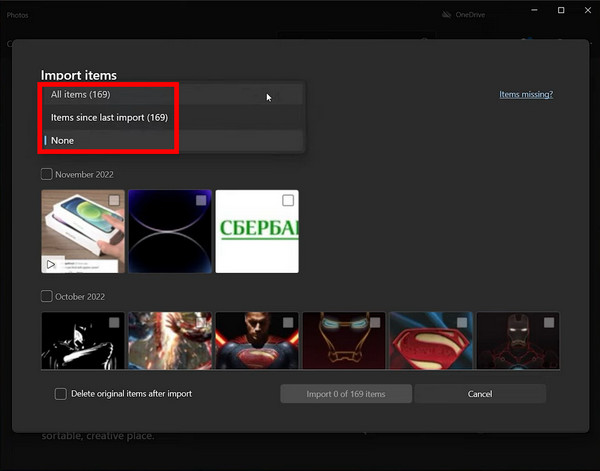
When you have selected everything, press theImportbutton.

After the transfer finishes, Photos will alert you.
it’s possible for you to go now and check out all the photos you took.
You will definitely find multiple ones occupying unnecessary space.
Select and delete them.
Using File Explorer
There are two ways of moving photos using File Explorer.
you’re free to either import all images or choose only keep the selected ones.

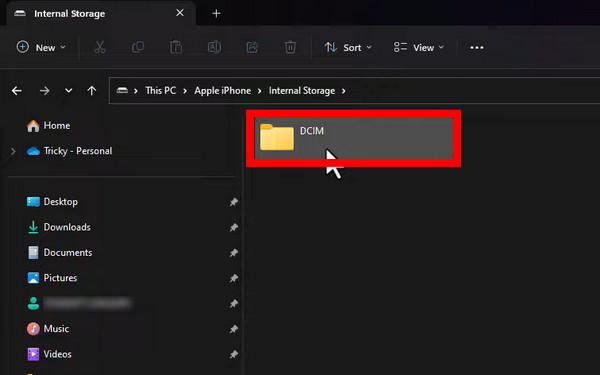
Once connected, the iPhone will show up as a connected drive.
If you press it and go inside this drive, you will find aDCIMfolder.
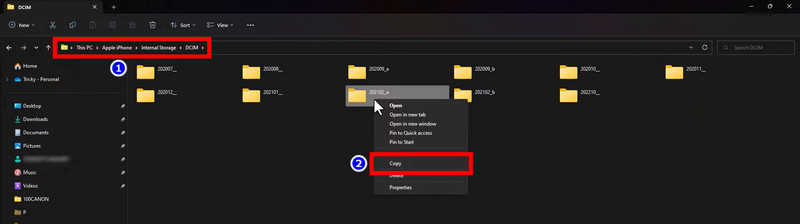
Here all the images are placed according to the months they were taken.
To select multiple photos, pressCtrland tap on the individual files.
After choosing the photos you need, copy them to your backup drive.
To keep all the images on your PC, simply copy the entireDCIMfolder.
Depending on the number of photos, the size of this folder can vary.
But if you are like me, clicking snaps all the time, expect this folder to be large.
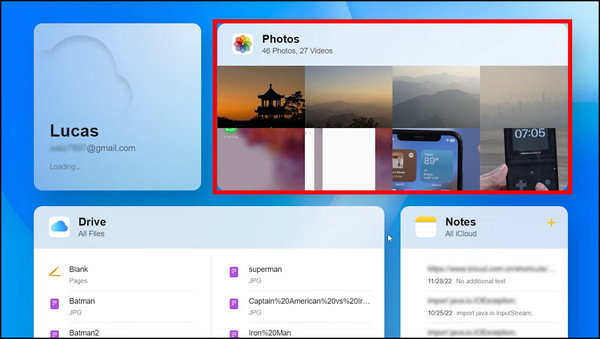
This is more like downloading the photos from iClouds web app.
But you must select to sync all your pictures toiCloudbeforehand.
Otherwise, you cannot download them from here.
There is another thing to consider.
The free iCloud tier only gives you5 GBof space.
Unzip these using any free tools such as7zip.
All your iCloud photos are now on your machine.
Frequently Asked Questions
Why cant I transfer photos from iPhone to USB?
So connect your phone and give all the permissions that pop up on your screen.
Also, ensure that the photos are stored locally on your phone to transfer them.
Why is my iPhone not showing up on my computer?
If the iPhone is not detected properly, it will not show up on your machine.
Try plugging it into a different USB port allowing the required permissions.
This makes it easier to edit if you are on Windows.
The best thing about every one of them is you dont need any third-party applications.
That means no bloatware, annoying ads, or even viruses in the worst cases.
Do share how your experience went in transferring your photos.
With that said, we have reached the end of this article.
