The internet is full of stuff you might share with your friends.
Maybe you saw a video of a cat napping and wanted to share it on your group chat.
But that website does not allow you to download that video.
Your Chromebook can save screenshots and capture the video on your screen too.
And it literally takes two button presses on your keyboard.
How to Screenshot on a Chromebook
There are two ways to take a screenshot on Chrome OS.
Press the key shortcuts or use the Chrome OS Quick controls toolbar.
Both methods allow you to capture either a section of the screen or its entirety.
And if you want to edit the screenshot, you’re able to do that too.
Here are the methods to screenshot on your Chromebook:
1.
Use the Keyboard Shortcut
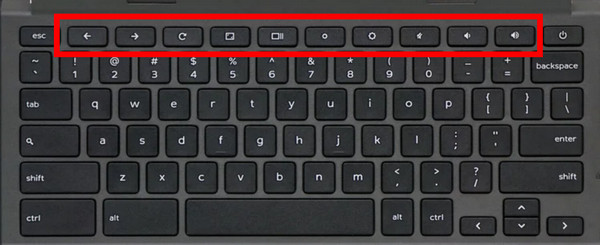
Chromebooks have a different keyboard layout compared to Windows or Mac.
The top rows of keys do not have the function keys as labeled on a PC.

Instead, you get Chrome-specific tasks associated with each button.
Similarly, the keyboard shortcuts vary depending on what you are attempting to do on a Chrome OS gear.
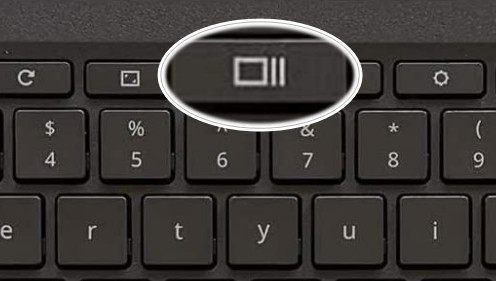
We will use theShow Windowskey to take the screenshot on a Chromebook.
It is basically theF5key on a normal keyboard.
It looks something like this.
In case thekeyboard isnt working on your Chromebook, refer to the embedded article.
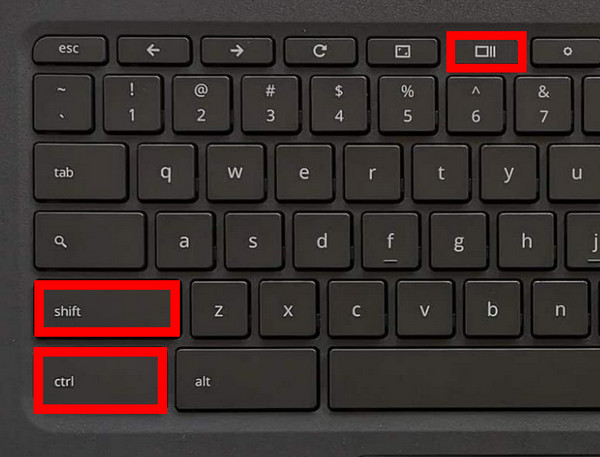
To take a screenshot of the entire screen, pressCtrl+Show Windows.
Upon pressing this key combination, you will see the screenshot near the bottom right of your screen.
It is copied immediately to your clipboard so that you share this instantly.
If you want to discard it, press the Delete button.
Similarly, you could add funny texts and edit them to your hearts content using the Photos app.
Clicking the Edit button takes you there, and you are free to make any changes to the screenshot.

Furthermore, check out how toperform a right-hit your Chromebook.
To take a partial screenshot, pressCtrl+Shift+Show Windows.
Now opt for part of the screen using your cursor that changes into a crosshair.
When you are done, pressCaptureand the screenshot is saved.
Its really that simple.
Theres another method to save screenshots.
Lets look at that now.
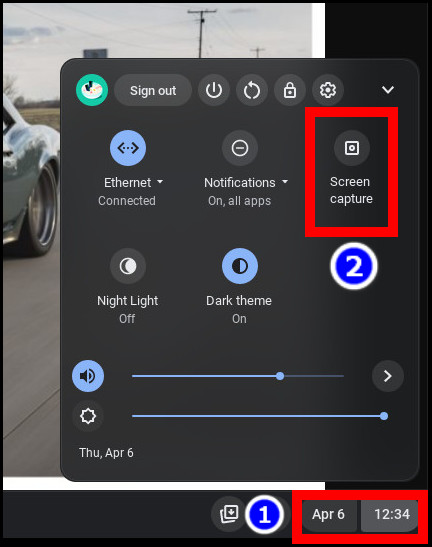
Use the Quick configs Bar
TheQuick Settingsbar is equivalent to the notification bar on an Android rig.
The stark similarities between the two are evident when you look at the icons here.
We will use theScreen Captureshortcut here to take a screenshot.
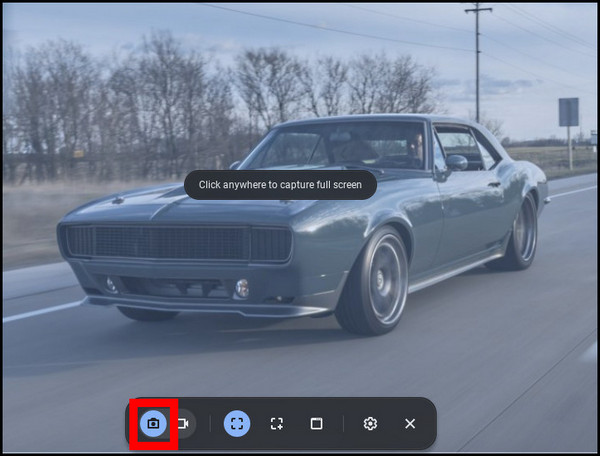
This opens up a floating bar containing all the controls to save screenshots.
There are three ways to take a screenshot.
Capture the full screen, save a cropped section of your screen, or snap any open windows.
Heres how to do it.
If you look carefully, the screenshot bar can also record videos.
Thats how you’re free to capture videos from any website.
Pretty cool, right?
Thats detailed right in the next section.
On a side note, follow our guide on how to doSplit Screen on Chromebook.
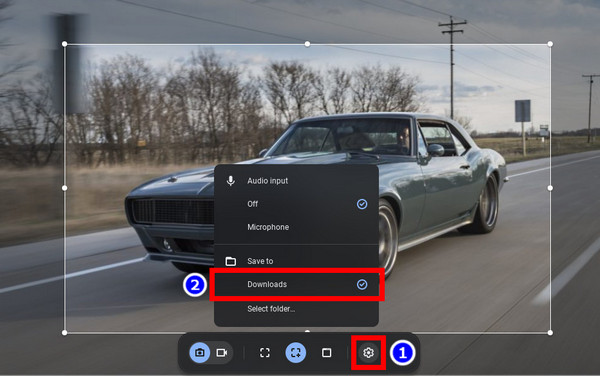
Chrome OS utilizes the same floating bar that appears when you pressScreen Capture.
Your recorded videos are saved to theDownloadsfolder in the default configuration.
FYI, Chromebook users can alsodownload YouTube videoson their devices.
Frequently Asked Questions
How do you take a screenshot on a Chromebook without a mouse?
PressCtrlandShow Windowskeys on a Chromebook.
This will take a full screenshot of your screen and save it automatically.
What are the key binds to screenshots on a Chromebook?
The key binding to save a full screenshot isCtrl+Show Windows.
If you want to save a part of the screen, pressCtrl+Shift+Show Windows.
Then drag and go for the part of the screen you wish to save and press Capture.
How to take a screenshot of your Chromebook without a Windows key?
Just pick the section on your screen and press the Capture button.
And that will consume the already diminutive storage space on your Chromebook.
Thats why I use the default screenshot app implemented by Google.
It works and performs just fine.
No complex setup or configurations are needed.
And not to mention how easy it is to use.
I hope you learned something new and exciting about Chrome OS today.
Until next time its goodbye.
