Have you ever tried running super old games on your new 13th gen PC?
Sometimes these games cannot recognize multi-cores correctly and result in crashes.
This is mostly due to apps built for single-core processors.

A possible fix is setting the app to only use a single core.
And it’s possible for you to easily configure this in Windows 10 and 11.
So, lets take a look at how you’re able to do that.
What is CPU Affinity?
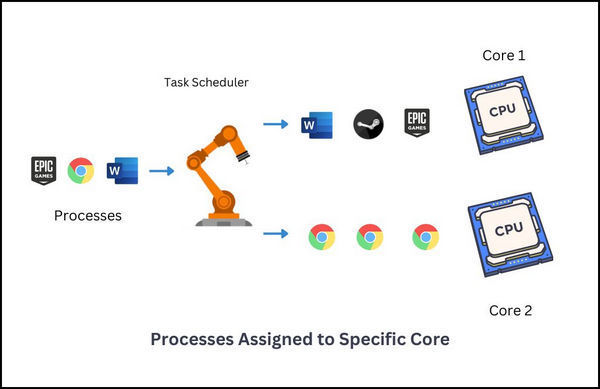
For example, if you select Chrome to only useCore 0, it cannot use the other cores.
The remaining cores are used for running the other applications.
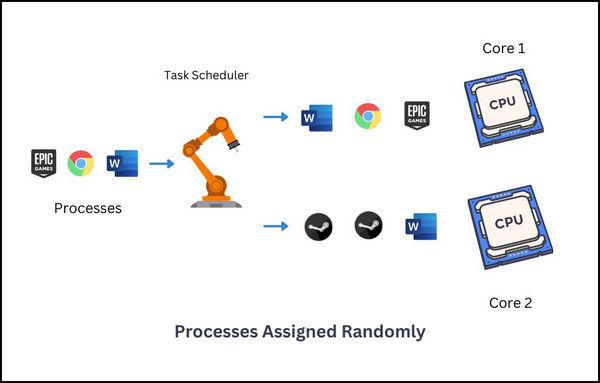
When you start your setup, many processes start executing.
Every tool has its own processes which are broken down into threads that contain these instructions.
The operating system is responsible for running the scheduling algorithms that send the instructions for execution.
The OS will not assign the instructions to different cores.
Instead, it will only use the core that you allow it to.
Does CPU Affinity Increase Performance?
But these have many factors connected to them.
For very old apps and games, you could limit the process using only a single CPU core.
Doing that can get you a good performance.
But what happens when you assign one core to modern apps?
Then you will experience slowdowns.
Some games do not do very well withhyperthreading.
Some users have got more performance by disabling hyperthreading.
It is better to let the OS handle the task scheduling part.
Lets go through the detailed steps now.

trigger the program and perform some benchmarks (for a game).
The before and after results will give you a good idea of the performance improvements if any.
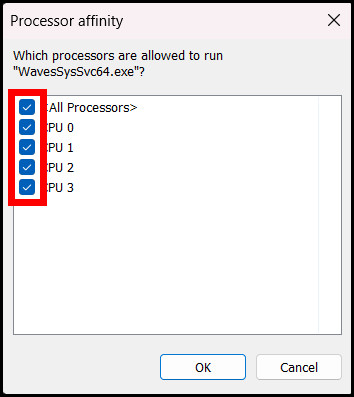
For testing purposes, you’re free to toggle between the number of cores using the above step.
Meaning you have to set theCPU Affinityevery single time you use the system.
Just initiate the shortcut and the app will run using the number of cores that you have set.
But how to do that?

First, you gotta decide the cores you will be using.
The previous section should help you on deciding that.
Let me dial down a bit.
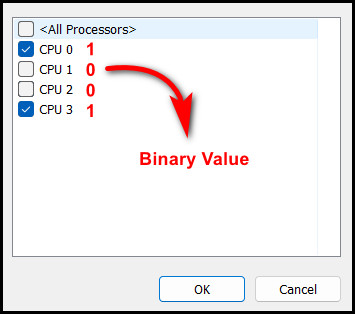
Lets say I have selected the first and fourth cores to be used by Chrome.
For active cores, the binary is1, and if unused will be0.
Then the binary number of the status of the CPU cores should be1001.
I am only using a quad-core processor, so there are only 4 digits for me.
If you have a hyperthreaded processor, this number will increase.
This image should clear any confusion that remains with the binary values.
Now use any online tool to convert the binary digit to hexadecimal.
after you grab it note it down.
The hexadecimal number that I converted was9.
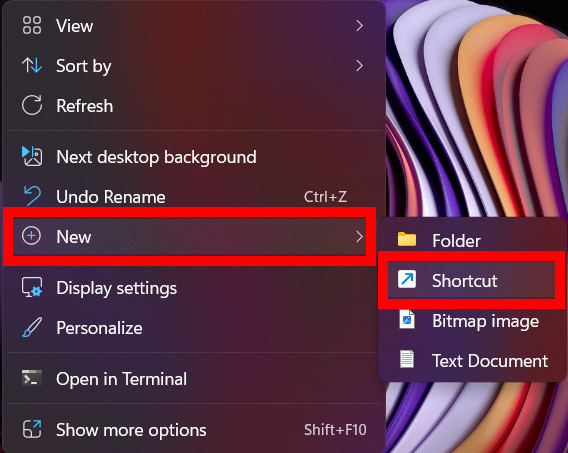
It is time to now create a shortcut and embed these configs for our app.
Now you would launch the app or game using this shortcut every time.
That way it will use the number of cores you have selected for them.
Check out another article toset CPU affinity on Linux.
Frequently Asked Questions
Should I set CPU affinity?
How do I permanently set CPU affinity?
To set the permanent CPU affinity of an app, create a shortcut.
In the shortcut target field, enter the CPU affinity value and the location where the app is installed.
Once done, save the shortcut.
Now you should use this shortcut to launch the app every time.
Final Words
Changing CPU affinity means you are the one controlling the applications performance.
When not getting the desired performance that you expect from an app, this option can help you.
But do not go about changing this setting for all applications.
Explore which apps can be beneficial from such tweaking and make changes accordingly.
Thats all for today.
See you next time in some other performance guides.
