As for myself, I couldnt find decent hair, and I wanted to make one.
I learned a few 3D animation software just to create the hairstyle I wanted.
Which software is the best to make Roblox Hair?
But you dont have to do the hefty work like me.
you better have the basic knowledge of using Blender for creating customized hair in Roblox.
You should know only three things for making free Roblox hair.
I recommend you to learn how to use curves, convert those to meshes, and UV unwrapping.
Heres our free guide tomaking clothes on Roblox.
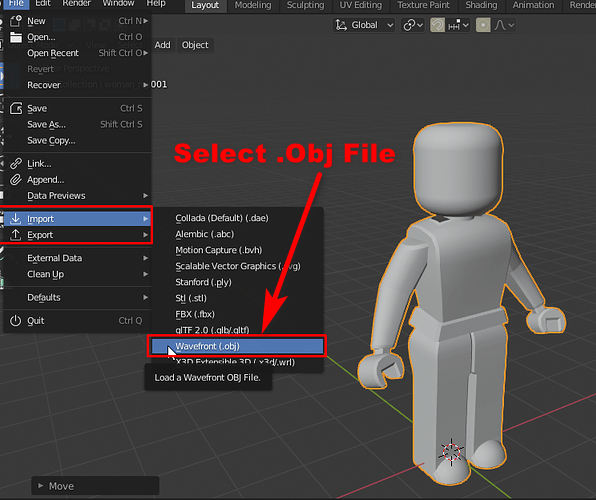
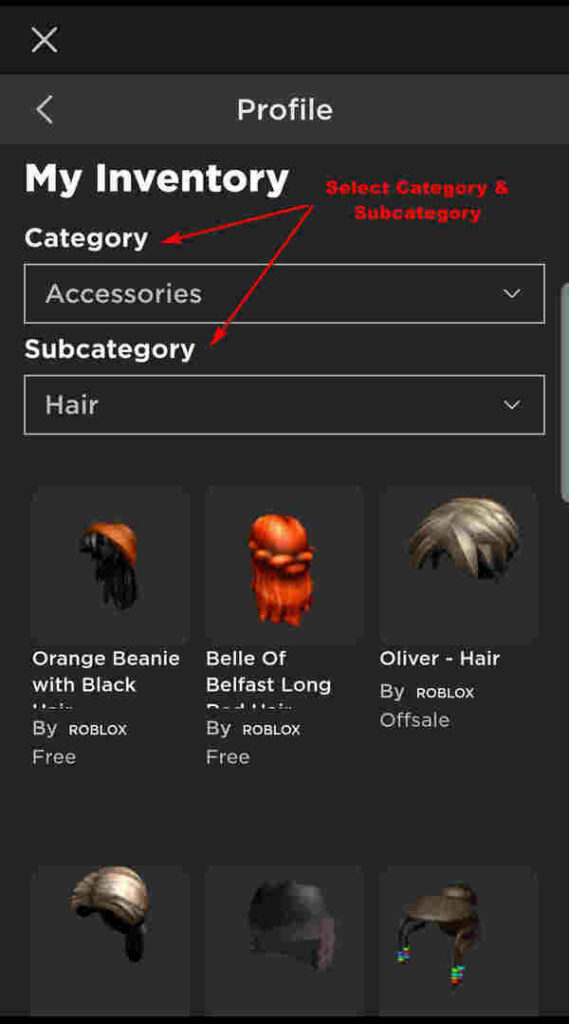
Load your character by typing theRoblox username.
If you dont have the plugin, Select View > Toolbox > Plugin and then Load the Character.
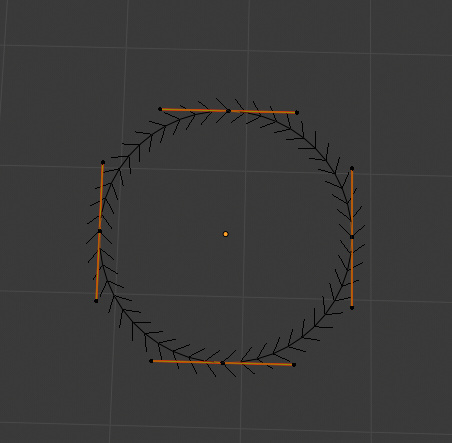
opt for head and select Add > Curve > Path and Add > Curve > Circle.
Navigate to the green curve symbol at the right bottom panel.
grab the Geometry and choose your Bezier Circle as the Bevel object.
You will see a tunnel shape appearing around the avatar head.
grab the bezier circle and go to Edit Mode.
Shape the loop the way you want.
Use the Mirror Modifier to get symmetry.
Enable Clipping from the right-side panel to join the objects.
Copy curves by pressing Shift and move it (if needed).
Also, check whether you might playRoblox on Ps4.
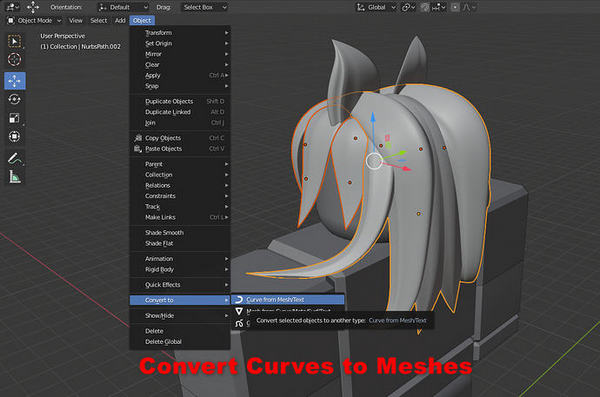
You dont want to upload your hair as curves, so you have to convert it into meshes.
Hey, dont know how to play Roblox?
Heres a complete list of all basicRoblox controls.
Go to Viewport Overlays and Enable Face Orientation.
If everything is Blue, then you are good to go.
But, if the face color is Red, your hair has some endings that need fixes.
double-check you have Edge select enabled.
Go to Edit Mode > Press Ctrl + Alt on one edge.
Go to Select > Checker Deselect and select every second edge.
Again go to Select > Select Loops > Edge Loops.
Press X and delete edge loops.
it’s possible for you to see the number of triangles in the lower right corner.
Perform this step for each portion of hair.
Remember, Roblox allows the use of only 10,000 triangles.
Check out our separate post on how toreset Roblox password.
Download and use Paint.net for this step.
Go to blender > UV Editing > bring up the saved Paint.net File.
Go to Shading > Add > Search for Image Texture.
Connect Image texture to base color and choose your image.
Also, check our separate post for fixingROBLOX Error Code 103.
Go to File > Export image as Wavefront (.obj) and switch to Roblox Studio.
Right-click and grab the insert object and Mesh part.
Open Explorer and Properties.
Go to Mesh File Selection and choose the image from the blender software.
Check our separate post on how you canfix ROBLOX Error code 267easily.
Load your character and spawn it as R6.
Delete accessories on the head and hair.
Go to Head > Hair Attachment, and you will see a green sphere.
Copy that file and paste it on the hair so that they can clip.
Go to Home and Move the green sphere to the perfect position.
Go to character > Right-click and Insert Object > Accessory > Drag and drop the hair folder into accessories.
And there you have ita pretty perfect customized Hair for your Roblox avatar.
One thing to remember is that, the hair shape changes when you were a hat.
Upload the items template to the avatar shop catalog page.
Press on the three dots above the box that contains the price and Buy Now Option.
choose the Sell Item Button and set the price of that item.
Your creation should be unique and affordable so that everyone can buy your stuff.
Always be careful with the pricing process.
A cheap-priced item takes less time to sell.
Check out some amazingRoblox factsyou may not knew.
Final Thoughts
Making a hair on Roblox is a bit tricky.
I have been there!
It took me one month to learn the basics of every animation software.
I know the steps are challenging for beginners, but you will get the hang of it.
