At a first glance, you may get confused about how to work with a breadboard.
Using a breadboard for your PC seems like checking whether your setup parts are functioning or not.
To get the proper result, you need an in-depth guide for breadboarding a PC.
In this article, I will demonstrate a step-by-step guide for how to use a breadboard.
Lets dive into it.
Breadboarding is often used by tech specialists to verify if all the parts are functional or not.
But it doesnt mean a non-tech guy cant use a breadboard.
The process is similar for both troubleshooting and new gadget checking.
The parts include your motherboard, a CPU with a ram stick & power supply aka PSU.

Check out our separate post on how tobest $2200 RTX 3080 gaming PC.
Here are the steps on how you might breadboard a PC:
1.
Most Motherboards have debug lights for CPU, GPU, RAM.
They also make beep sounds according to the PC components status.
Usually, mainboard companies upload all their mobo-specific information on their website.
We should collect the meaning of every beep code from either motherboards website.
Or we can get information from the manual that comes with the box of the motherboard.
For the breadboard, we will not use any external loudspeaker.
Use Anti-static Gloves
Dealing with computer parts needs some serious electricity caution.
Most PC parts tend to damage prone to static charge.
This is why it is always advisable to ground yourself before working with electric components.
As breadboarding is used on an open surface, this leads to exposing computer components.

As a result, the risk of getting shocks increases if there are not enough precautions.
So how can you save yourself from THORs thunder unleash?
The most convenient way is to use anti-static gloves.
Instead, they suggest using the antistatic mat.
Check out our latest post aboutbest $700 gaming PC build.
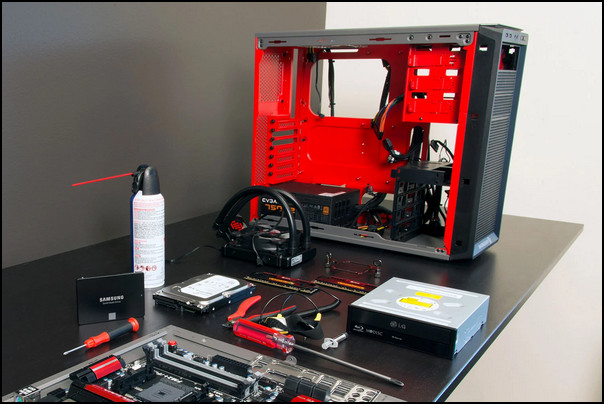
You need your newly acquired motherboard, CPU, RAM & PSU to test the parts.
So that you’re free to know whether these are dead on arrival or works like a charm.
Subsequently, put off your motherboard from the case.
Then place it back on the cardboard.
Dont forget to unclamp all the RAM sticks.
Without a CPU, the pc wont boot, so you oughta drop in the processor first.
Every CPU has an indicator on the corner to properly seat on the socket.
If that indicator matches, it will easily drop into the socket.
After that, ensure the CPUs clip which attaches the processor to the socket is properly tightened.
Be sure to put a pea-sized thermal paste on the processor before attaching the CPU cooler.
The coolers heatsink will automatically spread the paste, so no need to manually spread the paste.
Now its time to find out if the CPU is ok.
Turn on the PSU after attaching the cables.
If everything is ok, the coolers fan will start rotating.
Theres nothing to be confused when your PC beeps a single time, indicating no RAM is installed.
As we will attach RAM after this process, this beep sound is completely fine.
Also, check out the easiest way tofix PC wont go to sleep mode in Windows 11.
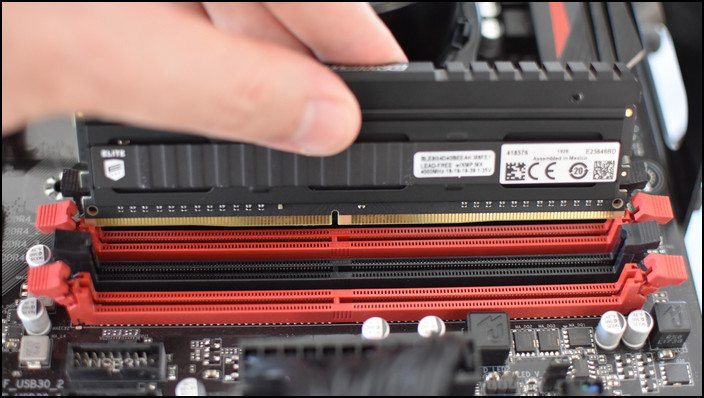
Now its time to examine the RAM stick.
After aligning the RAM stick, loosen the clips of the memory slot & insert the RAM.
If properly placed, the clip will lock the RAM.
You will hear a clicking sound when it clips the stick.
Now power on the system & check for any beep sounds that indicate faulty RAM.
If the RAM is ok, there will be no beep code for damaged RAM.
If there are extra memory slots & modules, you could check those in the same way mentioned above.
The latter part will cover this topic.
Installing GPU is pretty straightforward.
If the GPU is new, there will be a plastic cover protecting the display output slots.
You should remove those so that connect cables to a monitor.
Then find the nearest PCI-e X 16 slot to the CPU & put the GPU into it.
Like the memory slots, there is a clip for the GPU to lock it to the slot.
After putting the GPU in the slots, ensure the clip is attached properly.
If the GPU requires extra power connectors from the PSU, plug those cables.
Now power on the system & check everything is running smoothly.
Check out our separate post on top 5best water cooling radiatorfor water cooled PC.
For this reason, we will boot into BIOS to check further things if needed.
To do this, we need to connect the keyboard & monitor at this stage.
Generally, each manufacturer has a unique hotkey to enter in BIOS.
you could find this hotkey on the motherboards website.
After powering on & entering BIOS, it’s possible for you to check furthermore.
What are Some Cautions During Breadboarding a PC?
A breadboard is used to troubleshoot PC hardware.
However, you should maintain some caution, so that your experiment with the breadboard works flawlessly.
If you still find any difficulty, dont forget to comment.
